From the elegant petals of a timeless red rose to the tumbling sweetness of precious wildflowers and everything in between – flowers bring true natural beauty to so many projects!
So, if you’re looking to add some botanical beauty to your craft projects, whether it’s cardmaking, home decor or even sweet accessories, crafting your own fabulous florals is a must!
Creating authentic and stunning craft flowers is much simpler than it looks, and you don’t need to have green fingers either! So, put the watering can down and take a look through this blog for flower craft ideas and to find out everything you need to know about crafting your own flowers, plants and more from paper and foam!
Are there different ways to craft flowers?
Yes! Craft flowers can be made in a number of ways, today we’re going to focus on two papercraft techniques that are super simple, so you’ll be the proud owner of a glorious garden of blooms in no time at all!
The techniques we’ll be taking you through today are:
Quilled flowers
Flower forming foam
What are quilled flowers?
Quilled flowers are created by rolling up die-cut shapes in paper and card to create a gorgeous 3D flower or plant in full bloom!
There are so many Quilled Flower sets to choose from and each set will include a number of dies, all designed to work together to create die-cut pieces in different shapes and sizes that can be rolled up together to give the effect of stamens and layered petals! Often sets will also include leaf shapes so you can create a gorgeous and realistic looking bouquet of craft flowers!
How to make a Quilled Flower
We weren’t kidding when we said it was super simple, here’s a step-by-step guide!
Choose your die set according to what kind of flower or plant you’d like to create
Choose your card or paperstock – use thin cardstock
Create the following sandwich in your Die Cutting Machine:
- Clear Cutting Plate
- Plastic Shim
- Magnetic Shim
- Die with the blade side facing upwards
- Chosen card or paperstock
- Clear Cutting Plate
- Roll through your die-cutting machine
- Repeat with all of the dies in your set – you can use different colours for different layers if you like!
- Layer up the die cut pieces largest to smallest if there is more than one
- Roll up your die-cut pieces, and watch as your flower grows before your eyes!
- Slot stamens in the middle if required
- Secure together with tape or all-purpose glue
You’re all done! Let’s take a look at some stunning finished flowers and let your creativity grow!
What is Flower Forming Foam?
So, next on our stroll around the flower craft garden is the very clever, and super versatile world of Flower Forming Foam! This technique uses Crafter’s Companion’s specially formulated foam sheets that can be die-cut and heated to create the most realistic-looking petals imaginable! You can even add cute stamens for an extra-authentic look!
There’s a whole host of shades to choose from as well! Take a look at some of the packs below to find your perfect palette!
Get ready to create the prettiest petals! You’ll need a die-cutting machine, your flower dies, your chosen foam, the stamens, your heating method (you can use an iron) and ahot glue gun.
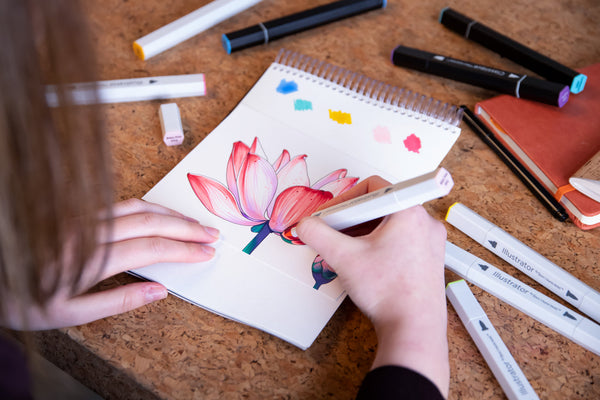
Follow the instructions in your die set to cut out your petal shapes from your chosen foam using a die-cutting machine. You can add colour using Spectrum Noir Water Reactive Inkpads if you like.
Take the largest petal shape and heat it using your preferred method. The edges should start to curl in slightly, which means it’s ready for moulding.
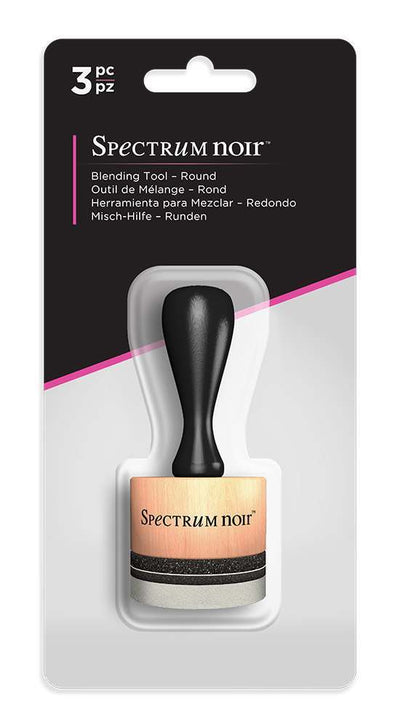
To get a rounded petal effect, take aMoulding Ball Tool and push the petal into a foam sponge, twisting and rounding to form the shape. You can also use the Petal Distress Tool by laying the heated petal on to the silicone tray and running the finger tool over it to create a rough edge effect. If you don’t have tools, you can get experimental with twisting, crinkling, scrunching and curling your petals by hand.
Repeat the manipulation process with the smaller petals until all of your petals are complete.
Warm up your glue gun, then add a blob into the centre of the largest petal shape. Stick the next smallest petals on top, then add another blob of glue to the centre of the petal shape and stick the next smallest on top. Continue until all of your petals have been used.
Take aPokey Tool, pencil or another sharp point and poke a hole through the middle of the layers.
Gather up a group of Stamens and add a blob of hot glue around them, close to the top, then pull them through the hole that you created in the flower until they sit in a natural position. Trim the excess from the bottom and your basic flower is done!
From this point, you can create leaves, manipulate them following the same steps, then glue them on with the hot glue. The possibilities just grow and grow!
What can I use craft flowers for?
Now you have your posy of pretty blooms all ready to bloom anywhere you like! Craft flowers are so incredibly versatile and can add elegance, natural beauty and colour to just about any project!
Here are a few suggestions!
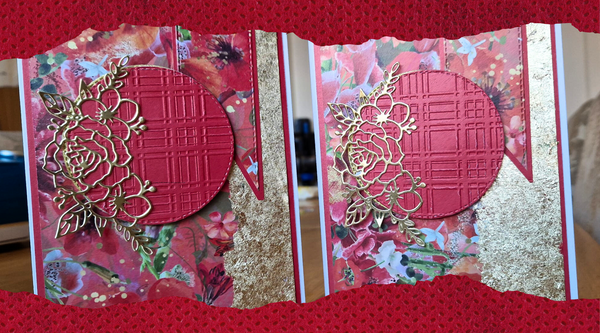
Pop them onto the front of your cards for a fantastic dimensional centrepiece!
Give your gift tags a little bit of extra oomph!
Create the most beautiful place settings and centrepieces
Wreaths and garlands for all seasons
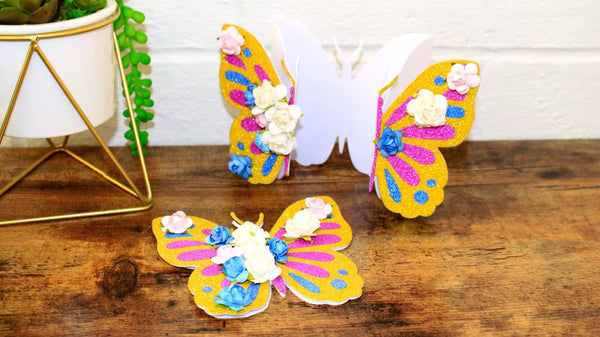
Faux bouquets that will last forever
The sweetest hair accessories!
If this post has got you thinking about exploring with nesting dies, why not tune into the below episode of The Craft Class on Crafter’s TV to find out even more about Flower Forming Foam and how to create amazing realistic blooms!
We hope this post has helped you get started with craft flowers, we’d love to see your sweet floral creations on social media. Share your photos with us onFacebook,TwitterorInstagramusing the hashtag #crafterscompanion.
Sign up today and get your hands on an amazing introductory offer!
We'll keep you updated with our fabulous offers, brand new launches, crafty must-haves and of course, get you feeling totally inspired. Let's get crafty!